Sunday, December 31, 2017

The 12-Days of After Christmas Giveaway - Day 6

What a yummy set of postcards I have today for giveaway for six people!  It is a piece of stump work with the four continents on it - it is a piece that is special for me as there is a series of these pieces with obvious teacher directed elements on it.

If you want a card - enter by sending an email to tricia@alum.mit.edu with "FOUR CONTINENTS" in the subject line.  Send your mailing address in the body of the message and send it by midnight Jan 1st.

Saturday, December 30, 2017

The 12-Days of After Christmas Giveaway - Day 5

Today we have a issue of Sampler and Antique Needlework Quarterly Spring 2015 for the giveaway. Please send your email to tricia@alum.mit.edu with SANQ 2015 in the subject line.  Then put your mailing address in the body of the message and send it before Dec 31st, midnight EST.

Tricia

Friday, December 29, 2017

The 12-Days of After Christmas Giveaway - Day 4

Today we have a Just Cross Stitch Magazine (2 copies) for June 2017.  Send me a email to tricia@alum.mit.edu with MERMAID in the subject line and your address in the body of the message.  Then get it to me by midnight EST on December 30th.

Tricia

Thursday, December 28, 2017

The 12-Days of After Christmas Giveaway - Day 3

Today's giveaway is another set of postcards for several people.

Four lucky people will get a copy of the amazing beaded basket that we helped the Holburn Museum purchase years ago with our beaded basket project.  And a lovely stump work piece.

If you want it - send me an email to tricia@alum.mit.edu with BASKET in the subject line.  Put your mailing address in the body of the message and send it by midnight EST on Dec 29th

Tricia

Wednesday, December 27, 2017

The 12-Days of After Christmas Giveaway - Day 2

Today's giveaway is for three people, a 2012 edition of the Just Cross Stitch Christmas Ornament Issue.

If you are interested, send me an email with JCS XMAS 2012 in the subject line.  Add your mailing address to the body of the message and send it by midnight EST on December 28th.

Get a jump on your stitching for next Christmas!

Tricia

Tuesday, December 26, 2017

The 12-Days of After Christmas Giveaway - Day 1

I told you that I have lots of yummy stuff to give away this year - so much so that I am doing the traditional 12 days of after Christmas.  Actually I have more than that but I will save it for next year!

So today we have a beautiful notepad made from a photo of a piece in the Holburn Museum.  A great place to visit and wonderful place to make your shopping notes weekly.

If you are interested in entering, send me a email at tricia@alum.mit.edu with NOTEPAD in the subject line.  Send it to me by midnight EST on Dec 27th with your mailing address in the subject line.

Monday, December 25, 2017

12 Days of Christmas Giveaway - Day 12 CHRISTMAS!

Merry Christmas and Happy Holidays to everyone!  I hope today is a good a relaxing one for you all.

To celebrate let's give away some holiday stump work socks!  These were made in France using patterns from English stump work and are one size fits all.  I have two pairs to make a few people happy today.

If you want a chance, email me at tricia@alum.mit.edu and put SOCKS in the subject line.  Then add your mailing address and send it to me by midnight EST on Dec 26th.

Have some eggnog for me! (ok - truth be told I prefer peppermint bark to eggnog...)

Tricia

Sunday, December 24, 2017

12 Days of Christmas Giveaway - Day 11

Yet another big giveaway as we are now at Christmas Eve!  I have six sets of the February 2007 Just Cross Stitch magazine with a project for my now closed company Tokens and Trifles.  The giveaway includes one heart shaped sewing card for you to do a chart from the project!

If you are interested, email me at tricia@alum.mit.edu with LIVE-LAUGH-LOVE in the subject line.  Put your mailing address in the body of the message and sent it to me before midnight EST on Christmas Day.

I have to tell the story of the Giggle scrapbooking board in the magazine photo.  You see my oldest making hilarious faces for the camera.  He was three and we were staying in Germany with my husband on a business trip for two weeks.  I was taking advantage of my husband being busy and took my son to Amsterdam that day (a day trip to another country on the train! Already you know things might not have gone as planned with a toddler).  I had arranged to visit the Purses Museum and its original owners who were so gracious to take the glass off the cases and allow me to examine their collection of sweet bags in anticipation of a book I was working on.  David played on the floor.  At one point he got pretty annoyed with me that I was taking so long so to get attention - he dropped his drawers.  Yup, that got our attention and they laughed mightily while I was horrified.

After leaving I just had to meet and visit Martin Ex in his shop in the center of the city.  After feeding David and putting a pile of toys on the floor in the shop, I drooled over the samplers.  At one point I was talking to myself - 'gosh I want this'.  David heard me and in a typical 3-year old response said 'Isn't it your birthday today mommmmy?'.  That was all I needed and the first sampler I ever bought was packed up to ship overseas.

These pictures resulted from our train ride back.  By then he was soooo tired, cranky and nasty that the conductor had taken pity on me and those on the train and ushered me into a small private car with him.  I was desperate to keep him quiet and decided to use my new digital research camera with a screen on the back to let him make faces at the camera.  It kept him busy for over an hour as we sped through the Dutch landscape.  And of course it produced some of the funniest pictures we have of him.

As I write this blog I am smiling remembering that hectic day as a young mother - and crying a bit remembering some of the past.   I am writing these blogs to busy my mind today to distract me as we wait a few more hours until the minute that the college of his dreams releases their decision.  I am sick to my stomach right now.  6:58pm.  Dreading it and what stress these colleges are putting on all these talented kids (Yesterday Harvard came out.  David told me that someone brought a F**K Harvard cake to school and gave pieces away to all those rejected - some 60 kids with amazing accomplishments).   They rejected one of our absolutely amazing robot kids who will definitely be CEO of a tech company some day.  Their huge loss I told him last night.  At 6 pm David's girlfriend gets an email from Brown telling her if her dream is fulfilled.  6:58pm is MIT.  It is a hard week for everyone.  You know yes or no and then a long wait if it is a no until the spring to see if you get accepted by anyone.   All of these kids have done 'everything right' - studied hard, gotten A's, worked in the community, stayed clean/sober, and are well spoken great citizens.  It is so hard to watch them take hit after hit when we all tell them if they work hard, they will do well.  They will do well - but not where they wanted to be.

So sitting here and looking at the funny face guy is a great antidote to the stress of the moment.  And a reminder to Live - Laugh - and Love.

Tricia

Saturday, December 23, 2017

12 Days of Christmas Giveaways - Day 10

Today's giveaway will go to many people - so enter as you have great odds!  I have 11 postcards of a Fitzwilliam band sampler to give away.

To enter - send me an email at tricia@alum.mit.edu with FITZWILLIAM in the subject line.  Add your mailing address and send it to me by midnight December 24th EST.

Friday, December 22, 2017

12 Days of Christmas Giveaway - Day 9

Today's giveaway is a Spring 2014 issue (one of two copies) of Sampler and Antique Needlework Quarterly.  This one has a love article about the Interwoven Globe exhibit at the MET.

If you would like this issue, send me an email to tricia@alum.mit.edu with SANQ 2014 in the subject line.  Add your mailing address to the body of the message and send it by midnight EST on December 23rd.

Tricia

Thursday, December 21, 2017

12 Days of Christmas Giveaway - Day 8

Today's giveaway is one of two copies of the 2017 Just Cross Stitch February issue.  If you want to enter to win one - send me an email at tricia@alum.mit.edu with JCS FEB 2017 in the subject line.

Add your full mailing address to the body of the email and send it by midnight EST on Dec 22nd.


Tricia

Wednesday, December 20, 2017

12 Days of Christmas Giveaway - Day 7

Today's yummy giveaway is a set of 2-postcards from the Ashmolean and were part of the exhibition a few years ago that led to an amazing gift of embroidery to them.

If you would like a set (I have two sets to give away), email me at tricia@alum.mit.edu and put LION in the subject line.

Add your MAILLING address in the body of the message and send it before Dec 21st at midnight EST.

Tricia

Tuesday, December 19, 2017

12 Days of Christmas Giveaway - Day 6

Today's giveaway is one of two copies of the 2017 Just Cross Stitch October issue.  If you want to enter to win one - send me an email at tricia@alum.mit.edu with JCS OCT 2017 in the subject line.

Add your full mailing address to the body of the email and send it by midnight EST on Dec 20th.

Tricia

Monday, December 18, 2017

12 Days of Christmas Giveaway - Day 5

Today's giveaway is one of two copies of the 2017 Just Cross Stitch Christmas Ornaments issue.  If you want to enter to win one - send me an email at tricia@alum.mit.edu with JCS ORNAMENTS in the subject line.

Add your full mailing address to the body of the email and send it by midnight EST on Dec 19th.

Tricia

Sunday, December 17, 2017

12 Days of Christmas Giveaway - Day 4

Today's yummy giveaway is a set of 2-postcards from the Ashmolean and were part of the exhibition a few years ago that led to an amazing gift of embroidery to them.

If you would like a set (I have two sets to give away), email me at tricia@alum.mit.edu and put POSTCARDS in the subject line.

Add your MAILLING address in the body of the message and send it before Dec 18th at midnight EST.

Tricia

Saturday, December 16, 2017

12 Days of Christmas - Day 3


Today's giveaway is the Annual Halloween Ornaments Spooktacular issue of Just Cross Stitch 2017.

If you are interested - put SPOOKTACULAR in the subject line and include your MAILING ADDRESS in the body of the message.  Send it to me by midnight EST on Dec 17th at tricia@alum.mit.edu

Good luck!

Tricia

Friday, December 15, 2017

12 Days of Christmas - Day 2

Today's Giveaway is another exhibition leaflet from Joy Jarrett from Witney Antiques.  This one, called Historical Embroideries mostly covers 17th century pieces in its quarter folds.

I have 6 copies of it to give away.  To enter:

Send me a email at tricia@alum.mit.edu with HISTORICAL in the subject line.  Then in the body of the message, put your mailing address.

Send the entry before midnight EST on Dec 16th.

Tricia

Thursday, December 14, 2017

12-Days of Christmas Give Away - Day 1

I have an enormous number of give aways for this year's 12-Days of Christmas and it just might spill into a 12-Day of after Christmas too!  They are going to start with a series of booklets given to me for this purpose by Joy Jarrett of Witney Antiques.

If you are interested in the give-away, please send me an email to:  tricia@alum.mit.edu by midnight EST on Dec 14th - to allow me to sort and find your email you need the following two things:

1) INDUSTRY in the Subject Line

2) Your name and mailing address in the body of the message.

These first two give aways are a tribute to a couple who have had a big impact on historic needlework for decades.  Joy and Stephen Jarrett.  Stephan passed away in April at aged 80 and Joy recently passed away in September at age 79.  They founded Witney Antiques in 1963, and while they had a lovely stock of 17th century English furniture and clocks, they were really know world-wide for their incredible stock of 17th century embroidery and 17th-19th century samplers.

One of the things I loved about Joy and Stephen was there openness to the embroidery community.  They inherently knew that we who embroidered appreciated these pieces as much as those who had the funds to collect and that, perhaps there were some who over time would move between those two sets.  So they held 'exhibitions' yearly of embroideries on sale and some borrowed using themes in the pieces to gather and explain.  For those of us who know that museum exhibitions of embroidery material are few and far between, Witney's annual exhibitions were a pilgrimage if you could get there to view them.  A visit to their shop was a guarantee of viewing some 50-100 pieces of 17th century embroidery and samplers.  Such a treat and they were always welcoming to those of us who had a bus load of embroiderers who wanted to see.

On top of that, they published a leaflet or book for each exhibition - a catalog of pieces which for those of us who need inspiration or study needlework, are almost bibles.  Justin, their son, became a great photographer while working on the annual books.  And their daughter, Rebecca, first a partner and now the owner of the shop and is carrying on their legacy, became highly interested in the history and has written notable books in the field.

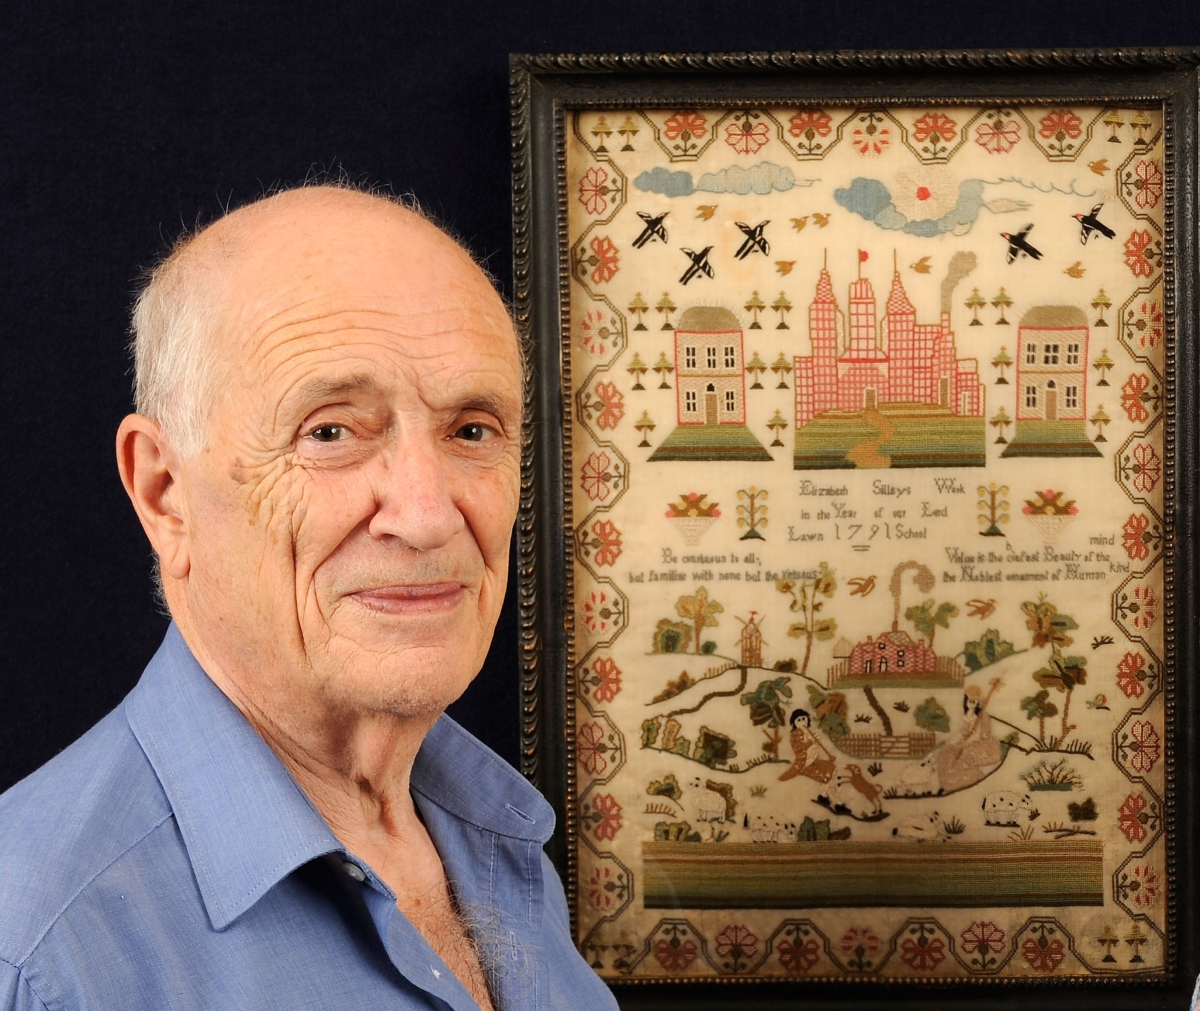
I first met Joy and Stephen when traveling England to set up the Jacket Tour.  They were enthusiastic to become a stop on the tour - and would be hosting their most amazing exhibition of 17th century embroidery yet.  What a spectacular moment.  But I was also interested in a piece they had on sale, a part of a jacket that I wanted to investigate.  They were so willing to take it out of the frame and allow me to do research photography of it before it was sold.  Taking me into the back to see other rare items relating to my research.  My brother and I were there for a few hours and Stephen suggested that we walk down the street together and have dinner in the pub as we must be famished before our long drive to the next stop.  What ensued was a meal over stories of his and Joy's grand travel adventures (they were very daring in their younger years) and much laughter.  Gracious to the last.

It was on that trip that I first saw a piece of embroidery of silk purl work (hanging above Joy's head in the picture).  Over the course of 10 years, I visited it and used to remark upon it every time.  Joy was so happy when I finally realized that I just had to have it three years ago.  She knew it was going to the one person who really knew what it was and appreciated it.

On my last visit to them before they passed away, Joy decided to give me a box full of her exhibition catalogs to use as gifts and prizes for embroiderers.  As long as I paid the shipping, she stuffed the box full.  Today and tomorrow I have the last of these lovely leaflets (first one below) to pass on to someone lucky.  I hope that as you moon over the beautiful pictures you will think of how a couple went out of their way to embrace not only those who wanted to bejewel their walls with antiques but those who wanted to learn and admire from afar and how they enabled that for us all.

Thank you Joy and Stephen - your generosity and wit will be missed.

Tricia

One of the most amazing embroiderers from that exhibition of 17th century embroidery.  When things came out
of private hands Joy and Stephen made sure they were photographed and shared them with the world
before they disappeared again into obscurity.  For researchers and lovers of embroidery of this type -
that was a service to us all.

Today's giveaway of a quarter-fold leaflet of samplers


Saturday, December 9, 2017

"Someone Should Save This"

I hear this phrase all the time:  "Someone" should do something.  It frustrates me as that abdicates our collective responsibility to our cultural heritage, whether it be publishing of information, saving a craftsman business, or a crumbling work of art/culture.  Things that enrich us, preserve knowledge, or propagate humanism aren't always big money makers so innovation needs to be applied to make these wonderful things happen.  And we are always more than happy to participate in them once "someone" has done the heavy lifting of making it happen.  Often we travel around the world, spending vast sums on our vacations, to see things that 'someone' made happen.

So this effort I read about this morning was really interesting to me and opened up an amazing portal into something going on in France to make everyone that "Someone".

Chateau de la Mother-Chandeniers in France, a 13th century castle.  I now own a piece of it.


There is an amazing 13th century castle in France that was slated for demolition and requires some pretty hefty restoration.  Beyond the ability of the last owner to independently finance, he has turned to an online organization to use crowd funding to save French treasures.  Think how Kickstarter has revolutionized the funding of tech products or art/film projects.  Or call it "Kickstarter for History".

This is something I have proposed in a different form before at various museums only to be told that we can't go whole hog for small projects because departments are forbidden by their development offices to do small scale fundraising and the development people are focused on fat cats so wouldn't work with me (I tried at the V&A a few years ago).  I was amazed at how we were able to tap into the collective with the Plimoth Jacket Project and what good things that spawned to keep high-end embroidery alive and push it into a renaissance.  Why can't we do that in many places???

Read this article about how the "Kickstarter for History"called Dartagnans is offering shares in the 13th century castle that you can buy.  So for about $50-75, you can own a share of a castle.  That alone sounds pretty darn cool.  And someday you can go visit it.  They have actually raised the money already to save it - meaning buy it - now they are working on the stretch goals to get the first stabilizing work done as it hasn't had a roof for almost 80 years.

After you consider buying a share in a French Castle (don't we always dream of that!!), check out the rest of the site to see the type of historic projects that are up for funding.  It is a really cool idea!

Be that "someone" today and help save our collective history.  My piece of a fairytale castle is on its way already for Christmas.  I will be really proud someday to visit it, even if it still stands needing a roof, knowing that we all helped keep it there for the future.

Tricia


Tuesday, December 5, 2017

The Elusive Unicorn


When I posted about the latest finished panel of the Harmony Casket last week, I promised some discussion on it and the good, bad and the ugly.  Well, here is the ugly.

I actually finished this panel back in early October and it has been sitting here looking at me for over a month - with my unicorn scowling at me.  I couldn't put on the mane and tail as I was debating during a very hectic 6 weeks starting in mid-October of business trip after business trip that blended into the Thanksgiving rush and now a robot completion every week until Christmas Eve.  The question - would I have the few days it would take to redo the unicorn??

So why didn't I like it?  Unicorns are cool.  Well, I had made the wrong choice on the thread progression when working it.  This is unicorn #1 below.  I had decided to use the grey silk gimps that I had made and were in the Season 1 Frosting Box.  There was a dark grey, a med grey and a white.  Knowing that unicorns are supposed to be white, I thought I would minimize the grey to an outline of one strand around the entire beast.  One spot, the haunch of the back leg got two lines of the med grey because it was big and I needed to make a turn of the gimp.

The first unicorn, everything is looking great on the satin and no reason to think that putting it together would become
a disaster that was already in the making.
It looked good on the fabric until I had to cut the pieces out and construct the head.  The first problem was the silk satin I was using.  It frays horribly and of course you need to clip corners and make the allowance thin to tuck over and whip stitch the head piece to the back of the body.  Because I was having trouble with the fraying, I wasn't aggressive with the turn over to get the two lines of gimp to touch at the seam.  This was complicated by the addition of the horn in the seam.  So when I was done, I had a head that had a 1/8" gap between the two pieces near the horn going around the snout.  

To fix that, I needed to whip on some gimp to fill the space.  But the gimp at the edge was the dark gimp.  That gave the snout a weird dark shadow around it that you can see in the picture below.  Then then the piece was attached to the ground fabric over the stuffing, I discovered in my haste to finish the entire side of the casket that I had forgotten to enlarge the pattern by 10% to allow it to bow over and still fit the outline on the fabric.  ARG!!  How stupid.  So now I was pulling at the piece while tucking under the fraying silk fabric and it missed covering the outline in two places.  The fix would have to be laying another line of dark gimp around the outside and in places, it might have to be two to three lines to cover the gap and fraying silk bits.  

Unicorn #1 - his snout with the dark grey stripe down its nose just annoyed me so much.


New body with medium grey on the outside and done
in a double line to make it thicker and more dominant
It was at this point that I got really discouraged.  I hadn't intended for the unicorn to be bounded by a real thick line of dark grey, it dominated and you didn't even notice the med grey color as a transition between the dark and white.  The snout really irritated me every time I looked at it.  I showed it to some trusted embroiderers and they weren't as down on it as I was.  But I knew I would hate that side of the casket the rest of my life.  So I left it aside.  My time crunch was upon me and I had to get the tent stitch slope done on schedule, run around the country and endure some serious demands on my time not knowing if I would ever be able to get back to making another one before the instructions would have to go up.  

So I set aside a few days to work until midnight on a new unicorn after Thanksgiving after shipping and other demands and managed to get one done.  There was a lot of thought and funny short lines worked in dark grey in ways that wasn't efficient for embroidery but put the dark and medium where they needed to be to give the best look.  Having the bad one to refer to helped tremendously in making the new one.  

One fix that really contributed was running a line of fray check around the silk satin where I wanted to cut it (the seam allowance line).  It wasn't next to the embroidery but kept the silk satin together when I was doing the turning.  What a difference that made!!  I was able to be aggressive with the turn and the snout ended up so crisp that I didn't need to add the planned dark grey line there at all and I don't really feel it is missing (note the rest of the body has one).  

Below you can see the two unicorns.  I am quite a bit happier with the second and will enjoy it on the side of my casket.  I am not much of a ripper - usually working on ways to fix vs remove work as I am pressed for time.  But in this case it was the right thing to do - and I wanted to share it with you to make you feel better about that piece that is sitting in the corner right now waiting for you to figure out what to do about something that bugs you.  

It happens to all of us.

The final unicorn and the one that got away.

Monday, December 4, 2017

A New Panel for the Double Casket Stitch-Along

This stitch along is working out well for me.  I now have 9 panels of 18 done for my double casket!!  That means in 12 months I have stitched half a casket and wasn't chained to the couch.  It just means setting a goal of getting a certain panel done during a month or a two-month period.  Something pretty achieveable when you think about everything else that I have going on around here (queue memories of 14 straight days with visitors/robot kids in my house - today is the first day where I could sit down and breathe in the morning).

I am starting to get antsy because of the number of panels laying around and am wanting to get the next panel done so I might start gluing them to the box.  It will start looking like something!

Tricia

Thursday, November 30, 2017

New Harmony Casket Side Done!

It is really amazing how much progress you get done when you concentrate on doing one panel of a casket or part of a panel each month!  I now have two caskets almost half done in one year.

So here is the latest side of my Harmony Casket - the one with the elusive unicorn!  I am pleased on how this has turned out.  But I wasn't always and so I will blog again soon about that story.  This is the second unicorn I stitched.


It goes really well with the finished frieze above it and I have already finished the next month's work early so it can be seen in its entirety!  Now off to work on the front of the casket.


Wednesday, November 1, 2017

The Flood has Started - Golden Threads Announcement and Others

I know by orders over the last two years that half my audience has been listening to my warnings that many materials will come to an end and half haven't, thinking things will be there tomorrow or that 'somebody' will rescue us.

I have said over and over that I chose to do the casket project as I had visited so many workshops where these high-end threads/fabrics/cabinets/etc are being made and could see the writing on the wall.  That we had about ten years at best while everything was still available.

Then the last month happened and it seems daily that I am dealing with the surprise 'end' of something or planning for the known end.  I posted last week on NING about the end of many of the lovely linens we like to use and the desperate work I and Access did over the last few weeks to convince the linen maker to make me 400 yards of the Old White Linen as a last run.   Things I haven't posted - the frame company I liked to use folded.  Looks like months later they may have a buyer but I haven't seen any pieces to evaluate yet.  The metal thread scissors we had gotten made - company doesn't want to make them anymore.  Gone.  Another major closing was just announced to stores today - but isn't public yet.

Richard and I have negotiated the last of the casket numbers.  I have been working on the website and my spreadsheets to make sure that I have it all right before I tell you exact figures.  But there will be less than 150 of the complicated caskets left (Double Caskets, Flat with Doors, and Flat Caskets).   The distribution is what I am working on right now and double checking and double checking.  Then I will announce order-by dates to get any locks you might want for your own work in the wood shop as I will be placing my last order.

So that made an email I just got take me by surprise and I knew I needed to post right away before people freaked out.

Bill Barnes of Golden Threads posted a few hours ago that he was going to retire (not a surprise - he is 75) on the Heritage Crafts Association website.   I certainly wanted to preface the announcement with why and what we are doing.

Bill really wants to increase production and pass on the thread making knowledge to someone else.  Our threads have gotten slower as he had and has recovered from knee replacement this year (the reason so many of you have been waiting forever for silk purls and some have realized that he stopped taking retail orders (I do not know if that was temporary or not) ).  We have been helping him by increasing the business volume for years - as the only way to get someone to train to take over the business is to see that the past and projected volume was healthy enough to support a person and their family with income.  That means a business needs minimum $500,000 or more in sales to have a workable income after costs, etc. Unfortunately his attempts to find a person have sputtered on and off over the years that we have been working on this project.  We recently gave him some projected numbers and he made some more attempts through local channels but now has to set a wide net to try to publicize through the Heritage Crafts Association network.  We can only pray that it works, it will take a bit to train a new person so it is not overnight.  Meanwhile, we have been prioritizing threads and keeping a list of what is essential to get produced before he shuts shop so several of the classes get their threads as advertised and other planned courses.

This concerns not only gold threads like #4 Silver and Gold on silk but silk purls of the original size and Gilt Sylke Twist.  Sadly in my book, I will not get a few lines of thread I really wanted to do.

I can say that we have had a great run of it all!  What a wonderful time we have had to play with our threads as these manufacturers start to move off into the sunset.  Know that within my limits of capital, I have been working as creatively as possible to buy, fund, re-engineer, transfer knowledge, and dig up sources to help keep anything alive that can be.  No stone is being left unturned.

But I think you know that, hopefully.

Tricia


Monday, October 9, 2017

Ask This Old House

That's the Ask This Old House trailer pulled into my
driveway in August
So I was just griping about how hard it is to set up a studio and get good film footage of me covering a casket.  Last time I did it, I flew my brother who has a degree in this out and we did it together in a week.  He isn't available for that at the moment, so I have to go it alone. 

Over the years, I have had experience with being on the camera or around productions for TV.  My son has been a regular for PBS kids programs starting with Curious George (I have a cameo there too).  It takes FOREVER to film a scene.  One day, he did two 5-minute episodes for PBS Design Squad Nation on location, it was 8-hours of filming.  We shot another two at my house, even longer as the location crew showed up earlier. 

We have filmed Shay Pendray's show, a film for the MET, and a documentary for LEGO.  It has been
A crew of eight needed for the sement - you can see me in the
background during a shot
fun, but not something I would want to do all the time.  But every time I do it, I learn a lot.  B-shots, how to cut sound together, etc.  Very useful when you are thinking of shooting how-to segments. 

So this summer I knew I would be working again on the videos for the caskets and so when an opportunity came up to do an episode of This Old House, I took it to recall how it goes.  I have loved that show since I was a kid and years ago I fell into the lucky opportunity to use the contractors on my homes.  Great and wonderful people and I can't say enough about the quality of the work.  So this summer, we were painting our house (Au Ver a Soie 4611 - I custom mixed the paint to the spool) and was
Well Rodger, I just don't know what to do about this rain problem!
having landscaping done.  Roger was doing the work and it was fun to work with him and the crew.  At one point we realized that an entrance to my house didn't have gutters and was spitting up dirt on the newly and now light painted section.  A solution was needed and I decided I wanted rain chains.

Trying to get the go-pro to work in the rain pot with the 'rain' ready on the
other side of the roof.
As I started talking to the Silva Brothers about putting up the structure for that, I mentioned that I had never seen it on their show - wouldn't that be a good episode.  And quick as a lick, the producers were in touch (they had wanted to film the inside of the house during the renovation for the regular show but we decided the crazy TOH fans who show up for 20 years asking for a tour isn't worth it).   A date was set in late August and the wheels were set in motion.

For me it was fascinating to see the behind the scenes of that production and to get to know the people.  I quickly got many tips (we will see if I can successfully use them!) about how-to filming as well as contacts for some ideas I have in the works for the future. 

So the episode of Ask This Old House will air in February with me and the rain chains.  It will be hilarious to watch as it is a bit modified for the format.  I didn't put up gutters and then go 'oh no, what will I do?  Call Rodger for help?'  But there is a format to do.  I think we must have done 15 takes of me walking out the door saying "Hi Rodger, thanks for coming".  "Hello Tricia, what a beautiful house you have..."  All the production crew hiding behind the trailer with the film footage
The producer protecting the cameras from the fake rain while
the splashing of the rain chain was being filmed close up.  They have so
much extra equipment on them at all times.  One young woman has two
messenger bags on her at all times with commonly needed stuff.
real-time wirelessly showing up on their screens.  We used Go-Pros in my gutters and the pot.  And a drone took footage overhead - Any tool to get cool shots.  Then some fake rain from a hose over the roof helped by a ladder.  All in all, it took five hours to film the segment.  And when you film outside, noise comes all the time to ruin a shot.  "Cut...lawn mower".  "Cut...truck".  "Airplane".  Hilariously, just as we were close to wrapping up the last shot - the bells in town started going off.  We all looked around... NEVER heard that before.  Seems Lexington had started a new thing, noon everyday they will have the church bells go off.  Really??? It was in a song too.  And an encore.  10 minutes of waiting until it was quiet again to yell 'Action!'

At one point Rodger was so tired of his lines that he gave some to me.  Apparently I sounded too knowledgeable about Vinca so after two more takes, the producer nixed that idea and gave them back to a grumpy Rodger who has more trouble remembering lines than I would have thought.  But then again - he has quite a lot of them!  I got to stand there and look very interested in a pile of rocks.  And they made me shovel! 

All in all it was a very fun day and worth it as now I know where to contract with film crews. 

But my son is still trying to convince me that I need an expensive film drone for my casket work....  I don't think so...

Tricia

Friday, October 6, 2017

Casket Videos...Take 42...Action!

The Grip - or griping grip - helping set everything up.  He has
to crawl on the floor to get out of the space without hitting
head as tables are pulled out into the walking space.
Oh my gosh is this hard.  I have been 'working' on doing the casket videos I want to put up for months.  Well, what I should really say is that I have been working TOWARDS making the casket videos for months.  There is scant finished product.

For most of the summer there were too many people and boxes in my space with threads all over the place, shipments and teens helping me out.  That was good, but I couldn't find my workspace to film a video.  Plus to add embroidery to the casket, there needs to be embroidery!  So working hard on that most of the summer and thinking about how I would film.

Then I get back from vacation and I plan it out.  I start trying to set up a 'studio' now that the house is quiet and I find that my ceiling is sloped and I will have to move my work surface out from the wall four feet to get it centered so I can put up a backdrop (bought a nice grey screen with stand).  Well, there are too many boxes of finished cut threads for several kits to move the work surfaces and set up the tripod far enough back while having the huge stand up with the screen.  So in the last two weeks, I pack kits like mad as some missing threads come in.  FINALLY - I can move the tables as there is room!

And so I get the grey screen up and I go looking for the video camera and microphone system I let
We decided this classic cooking show view was just too
difficult to turn on and a bit risky when I bent forward in a
V-neck shirt.  Note the special
clamp for an iPad to film with in front of me, we had
everything out at our disposal and kept taking shots to see
what would work the best.  Don't want a hand in the way of
what you want to see.
the kids buy for their robot videos.  Found them.  No battery charge.  Where is the darn charger??  Ok - that took DAYS.   Then I realized that I needed a second camera for close ups and that charger was missing too (doesn't anyone around here mark the darn things and put them back??? A search of every darn outlet on four floors recovers said charger).  Finally, two full batteries and a day full of school meetings (are you kidding me?).

I get home and I fire up the video camera to find out that the grey screen is SD sized and the cameras all shoot in HD aspect so you can see me on a grey screen with a super messy office on both edges of the shot.  Hmmmm, didn't think that through!  How about hooks in the ceiling to hang it horizontally so it becomes HD aspect to hide the room?  Don't want hooks in my ceiling.  So when I discover husband is off to hardware store, I tell him to get those removable hooks for the ceiling.  He took it too literally and didn't get any.  "They are for the wall", he says.  UGH.  Several days of other stuff and I finally get a chance to run to the hardware store.  Success, but need 6 foot tall teen to install with me.

Just a few of the crowded cameras
So yesterday was a good day, the teen was in a good mood and got interested in helping me set up the 'studio', realizing that he was going to record robot videos this weekend and they might as well use my office for that.  Phew, some expert help.

So for those who have never done stuff like this, there is tons of sitting there as 'the talent' with objects you intend to use.  The 'Griping Grip' moves the cameras and toys with the settings trying to find a way to have three cameras and a microphone to record the session (that can't be done over for some of the gluing) recording without seeing each other or cutting your head off in the shot.  Lots of gaffer tape goes on the tables and floor to mark the places where the tripods
Notice the microphone NOT plugged in.
need to stand.  Writing down of parameters so we know what zoom to use (I kid you, we forgot this step to my chagrin today when filming alone).

When everything is almost ready, off to find the talent's shirt.  You have to wear one shirt for all the videos so if you need to re-film to cut in or do it over days, the clothes don't change.  It was still damp in the dryer.  Oh well, the show must go on!  Damp shirt and all.

So we started with the mixing of the wheat paste as a test video as I could just make more if it went bad and I had no head in the shot.  Went pretty well.  The kid started all the camera equipment and then ran out of the room.  Was going well until the hamster in my office woke up and decided to get active.  We had actually talked about taking her out - but nooooo.... she sleeps all day.  So I had to cut out two minutes of her drinking and making a weird metallic noise in the background.

Don't you SLEEP in the daytime you loud
rodent?
I cut the video last night and was pretty happy with the result.  Emboldened to start again on my own, I got to work today.  I now am the proud owner of 40 minutes of 3-camera garbage.  First set of takes... forgot the casket.  Now you got to understand that to turn on one of the cameras, I have to climb onto a table and not knock off the other two cameras at lower vantage points.  So to turn it on and off is a big deal with real bodily danger involved.  Decided to leave it on while I ran downstairs to get one of the 'models'.  Ran out of space on the memory card midway.  Crud.

Start again.  Got 10 minutes into it, done.  Phew.  Review the footage.  Crap...the grey screen is caught on the back of my chair revealing everything behind it.  Ok.  Start again.  Another 'beautiful take' as I turned the viewfinder upside down so I could make sure the grey screen was in place.... but then when I felt totally victorious and was removing the memory cards to download and review it... that was when I discovered that I forgot to re-plug in the microphone system.  So that take of three cameras has no audio, just some dork pointing to things.

Ok.  Only an hour before the robot kids show up for the holiday weekend and the batteries need to be recharged.  So I blog and realize that I have spent the day filming and have no film.

This is going to take awhile!  And right now, that hamster has decided to wear her teeth down on something and it sounds like a beaver going at it in my office.  Mental note...she goes elsewhere while I film and put the darn phone on silent!!

Hopefully someone in the family will take pity on me tomorrow morning and set the cameras rolling and be sure it all looks good while I speak.

Tricia

Friday, September 29, 2017

Tough Choices when Designing Your Stitching

Harmony with Nature Casket - Left Side for the casket bottom and the frieze top
Often a teacher just shows the final project and it looks so well thought out and I get lots of comments about the ripping and the 'I can'ts' from my students.  This is common when working the Cabinet of Curiosities as the pieces are mainly original and thus so difficult to visualize and make choices.

So I thought I would pull the curtain back and show some of the hand wringing that went on when getting this latest Harmony with Nature Casket panel done.

I had a reasonably clear vision of the center of the cartouche, the stag was to be raised and everything else inside the oval should be low relief.  It is somewhat easier when dealing with motifs that are 'something'.  A cloud isn't likely to be stitched in red, so choices get a bit smaller.  But the outside of the piece, that could be ANYTHING.  I had studied many worked pieces of this designer (John Nelham, a long story on that conclusion) and noted that often the cartouche motif was outlined in a thick silk rococo in either cream, yellow or light blue.  It does a nice job of unifing areas that are filled with highly textural threads and defining the shape.  So off to getting it manufactured (a 2.5 year job with a few yards rushed to me just in time to work this piece!)

Putting the border around the cartouche
Silk purls in pastel colors around the edge
I studied many pictures and found several different ways to treat the ovals.  There are the silk covered parchment that is folded and stitched down in overlapping layers.  Then there are silk covered purls layered around the oval.  And one I really love off a piece at the V&A, silk covered plate that is crenelated and stitched down offset so the pattern of the hills and valleys are in a brick pattern.

Since this is a really small oval, the parchment idea is out of scale.  So I thought I would try the silk purls in the tiny size that I now have.  I had seen a version that used pastel colors instead of all greens and I loved it.  So off to work padding it and cutting little silk purls.
Well it wasn't until I got about 1/3 around the piece that standing back from it - I HATED it.  I couldn't quite put my finger on why and knowing how much work was in it, I didn't want to immediately rip it out.  And I was on a tight deadline staying up to 1am most nights trying to get it and instructions done as I had been out of the country most of the month.


I reverted to working on other areas more as sometimes the choices there will help make something really not work or lessen its impact. Finally it hit me what was wrong.  I had decided to work the order of blue-pink-green-purple-yellow and then repeat.  It was the purple.  Purple on its own is great, but it was the addition of purple right next to the yellow that was the problem.  The color mixing of the adjacent colors was making the purple/yellow look muddy and not the clear pastel look I was going for.  Crud.  If I was to take out the purple or yellow, I would have to rip it all out and I was running out of time.
Trying ideas on the side

So how about the other idea?  Using the crenelated silk covered plate to fill the oval?  I could use the new green one in the Frostings box as well as some of the nice striped cordon we have.  It would be super fast to couch it down around the oval and would compliment what I have planned for the top (its a secret...).  If I was going to have to waste all that careful placement of the silk purls by ripping them out - at least I could recover time with the fast filling of those group.  So I tacked some of it in place and did what I normally do - prop the frame on a table against a lamp across the room and walk around cleaning - getting glances at it from different distances.

Disappointment.  While I really loved the look of the treatment, it was too skimpy in this size of oval.  The cream silk rococo border took up visual space and the dark interior was just too thin to compliment the heavy motifs of the rest of the cartouche.  If it was just an 1/8" or so wider it would be fine.  That is why the silk purls looked so good - the 'weight' of them made it like you were looking into the oval the way I had envisioned it.  But I hated the brown tinge.

But I knew well enough from years of experience that I should continue the rest of the piece and not take it out until I was super-duper sure that it wasn't going to work.  What if the colors I chose for the rest of the piece dominated and 'brightened' the oval.  Maybe I would decide that I needed to abandon the pastels all together at the end and do it in greens/yellows like we often see.  So I pushed on, disgusted by my stupid choices (you really beat yourself at midnight when working on a deadline!).  And honestly if I wasn't on a deadline it would still be sitting there by my work table half done like I hear from so many of you when you run into a problem.

Trying to do something new in the side motif
So to fill the side motif, I wanted to do something I had seen on a lovely mirror at the MET that has similar shapes.  The silk purls are laid down and couched over the side to fill areas and the veins were worked in loops.  So I got to work.  The idea was to fill the bottom with dark green and shade each segment towards the moss green.  Quickly I didn't like it and I also thought it was difficult and fussy.  Would the students have success if I was having a challenge myself in estimating each cut?

So again, I abandoned this side and lucky there is another motif of this type mirrored on the other side!  Leave the work in and try another idea on the other side and compare the two from afar.  I did what we have seen done most often, ignore the vein lines and overlap the silk purls to splay them.  Now I was honestly a bit disappointed - not in the look, because it looks great - but in the 'creativity aspect'.  This box has the same cartouche on each side and there needs to be some amount of sameness in the treatment so they relate in a nice overall look to the box and it focuses the attention to the center of the oval.  So by choosing this treatment, I was going to end up doing eight just like it. Sniff.  Not so out of the box as I was hoping.  But right for the piece I would have to say.

More successful
So back to the other side and ripping out of the vein example and matching the left.  So that left me with the petalled motif at the 45 degree points and the oval to figure out.  I looked at the piece from afar and it was obvious to me that the one color in the palette that wasn't used much was blue.  So I tried it and admit that I bounced around a lot between the 0072 and the 0277 color.  Dark or Light, Dark or Light?

I settled on the lighter version of it and stitched them all.  All of a sudden the blue brightened up the piece.  But I was left with it feeling a bit flat in that area.  I might need to add to the petals.  I had originally been thinking of filling it with something textural and with the blue color limiting my choices of thread I defaulted to satin stitch - somewhat because of time pressure too.  Given more time I might have made the mistake of outlining it in the cream rococo as well to put in something more loopy like the silk soutache.  But that hooked rug look might not have been so crisp as it needed next to the loop look of the oval with the silk purls.

Hey - that blue makes everything look a bit better!
It was at this point that I had to go back to working the oval.  To rip or not to rip.  I think my husband was super tired of hearing me say that it looked muddy (before the blue).  And honestly he is not my go to guy for design advice.  (Please stop wearing navy with black!!).   But my oldest boy is.  He is the one who is torn between industrial design and mechanical engineering as a career.  He is the 'engineer' chosen by the art department to go to Art All State - something he was terribly embarrassed about because he isn't choosing to go to art school.

So I said, David - should I rip it out or not and get rid of the purple?  And what did he say?  "No. It looks from here like a wreath of tiny flowers laid around the oval.  It's ok mom"

Done.  The master has spoken.  We jointly decided to emphasize the blue a bit more by making it complex by adding needlelace petals in gilt sylke twist in the darker color that I had been torn between.  So both got on it, that made the blue more layered and the glint brought the eye out to the bright part from the muddy purple.

The piece almost done with the contrast between the satin stitched blue petaled sides and the ones with the needlelace petals added in the darker blue.  There is just something about the shadows that really add to the piece as well.  It makes the oval go from standing out to being part of a whole ring of dimensional parts.


I actually really like it all now.

So that is my background story to how some of these pieces get made.  You start with some loose ideas and feelings you are going for.  Pictures of pieces you like.  And you just plow through the hard decisions, sometimes trying more than one idea and often you just need to post a picture and say "is this ok??".

Now the antlers.  If anyone recalls in the Stumpwork instructions for COC 2.  You might recall TWO sets of antlers.  Yup.  I made two complete ones in different techniques.  They are sitting in a box waiting someday for the perfect need for them on another piece.  Ha ha.

It is funny, in engineering we celebrate these failures as a necessary part of getting to the right answer.  But women in handwork abuse themselves verbally about making a mistake.  About not being perfect.  About being stupid to not see the answer the first time.  We got to get out of that mindset as it is keeping us all back from creating.

Tricia